We are super excited to introduce the slot filling in API.AI! It greatly simplifies building dialogs. In fact, you can build a simple parameter collection dialog within a single intent if you’d like!
Let’s say we want to create an agent for sending messages. We’ll need to collect values for the following parameters: “text” and “name”. We’ll also want to make sure that we’ve matched all the values correctly, and to give users an opportunity to edit the values.
Here’s an example of this type of dialog structure.
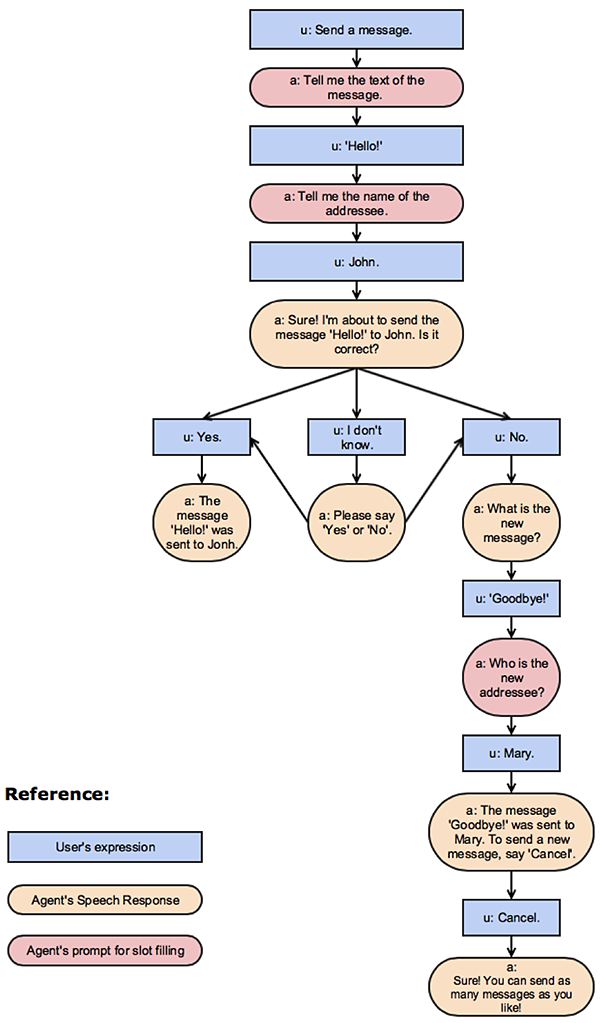
It’s important to outline the dialog structure before you start building your agent, since this will help you choose the right tools within API.AI. For example, you can see that we will be using the slot filling feature for linear parts of the dialog, and contexts for when it branches into several possible variations.
There will be 6 intents in our agent:
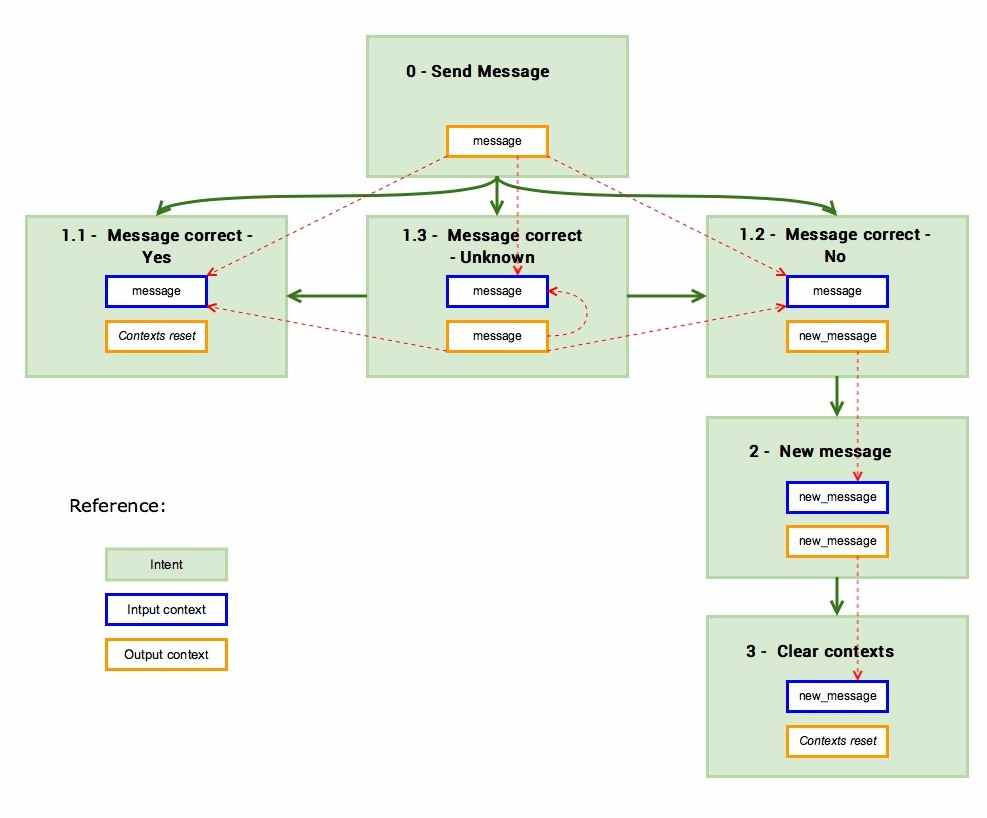
The first intent “0 - Send Message” will collect the values for the “text” and “name” parameters.
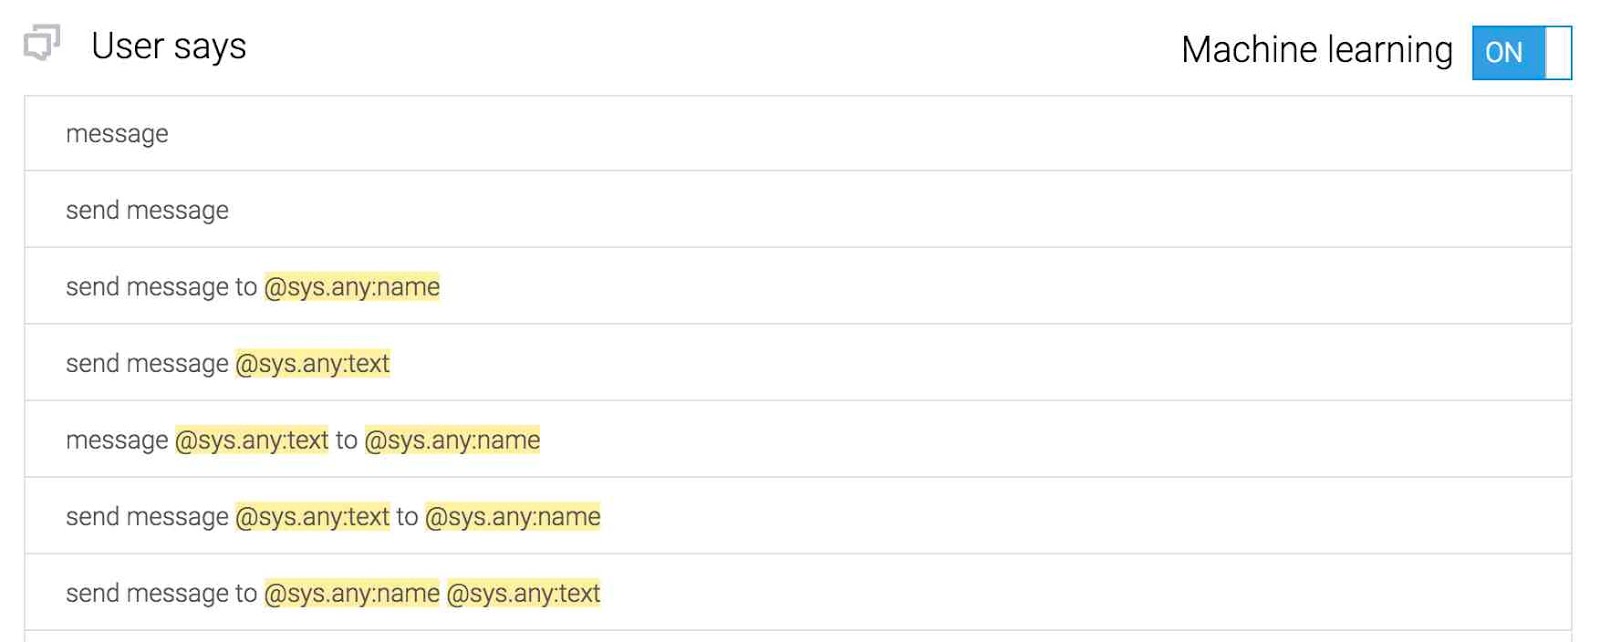
A user may start a dialog providing zero, one, or two parameters in the first phrase:
- “Send a message” – matches no parameters
- “Send a message to John” or “Send the message ‘Hello!’” – matches only one parameter (“name” or “text”)
- “Send the message ‘Hello!’ to John” – matches both parameters (“text” and “name”).
We describe these variations in the intent:
In this intent we want to fill all the necessary slots, which is to say we have to collect all the needed parameter values. To do so, we’ll mark these parameters as Required. Then we’ll use Prompts to ask the user for parameter values that were not contained in their initial request:
>
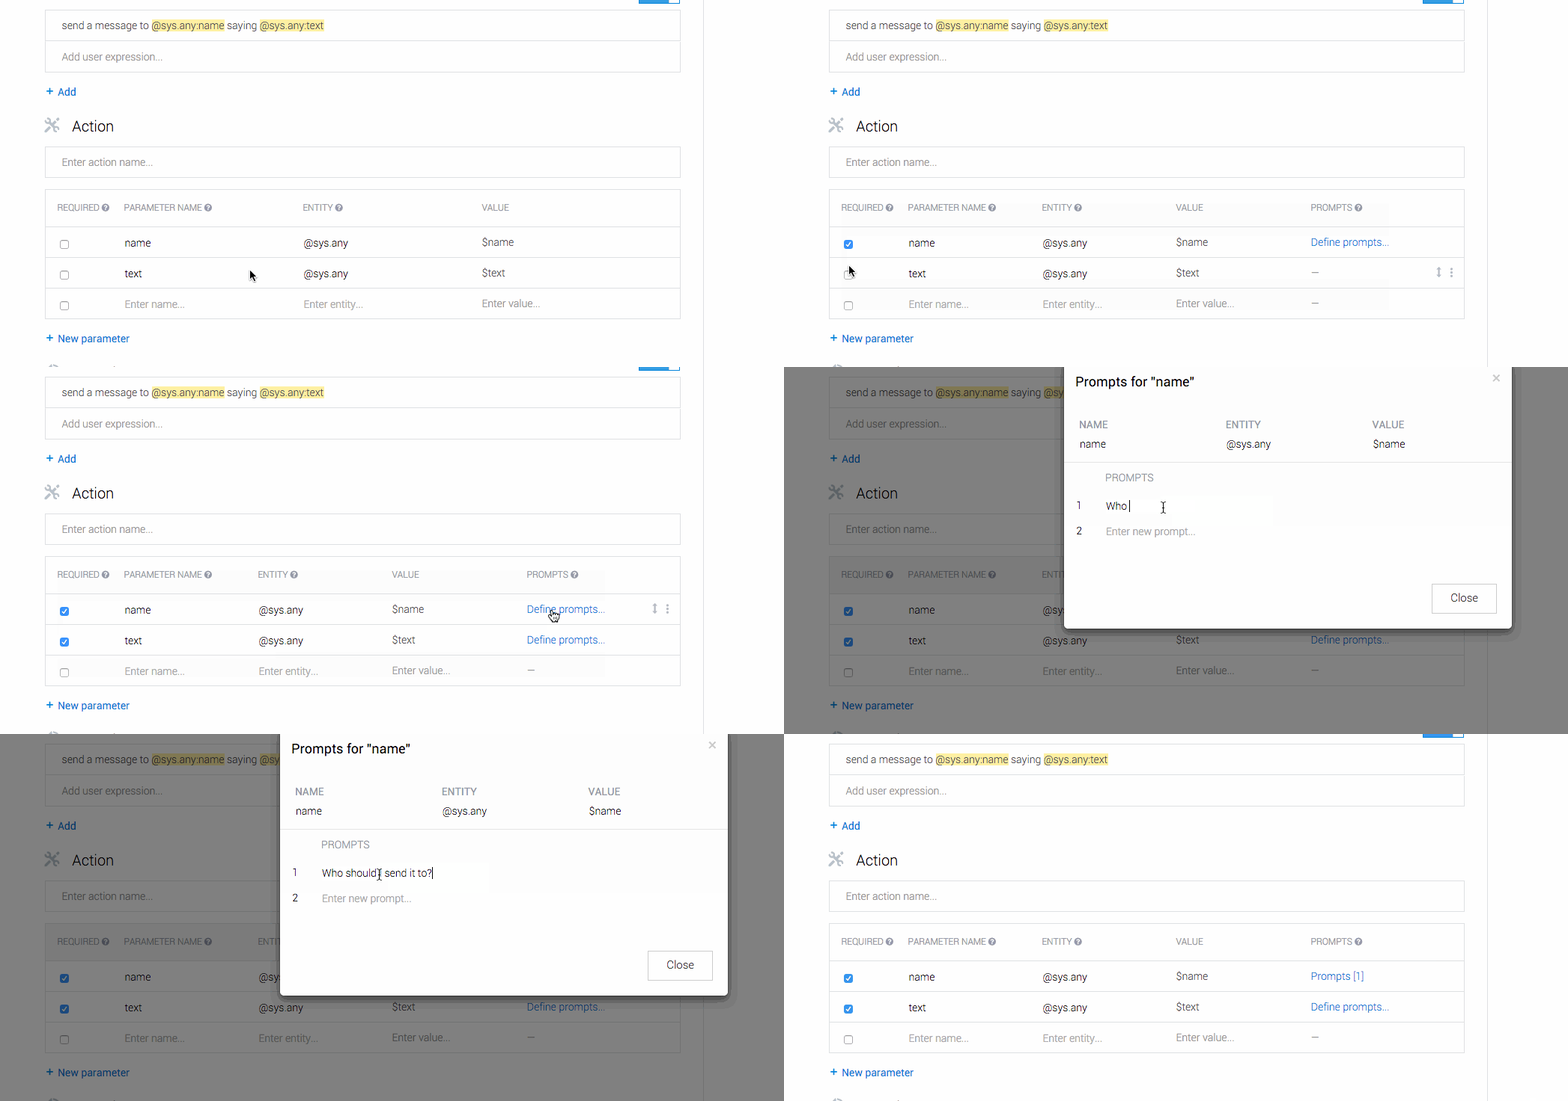
If you want to change the order of the questions, use the arrow on the right to drag and drop the parameter lines:

When all the necessary values have been collected, the agent will respond with the phrase that has been defined in the Speech Response field:

The question “Is it correct?” creates the need for branching in the dialog structure:
- If the user answers “Yes”, the agent will just send the message.
- If the user answers “No”, the agent will suggest to edit the message.
- If the user’s answer contains neither positive nor negative meaning, the agent will insist on receiving a “Yes” or “No” response.
To catch these possible answers, we are going to create three new intents:
- 1.1 - Message correct - Yes
- 1.2 - Message correct - No
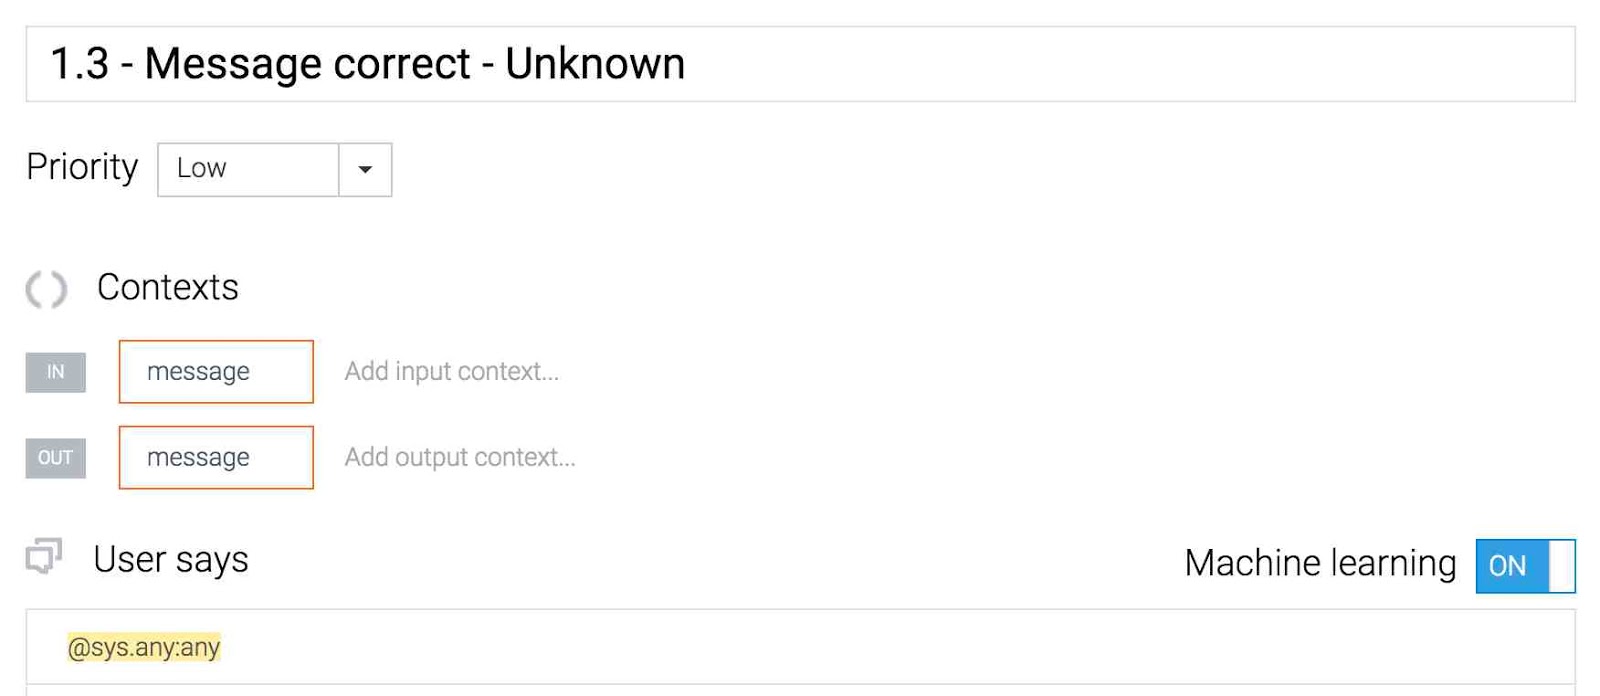
- 1.3 - Message correct - Unknown
But before we do this, we’ll define the output context in the 0 - Send Message intent:
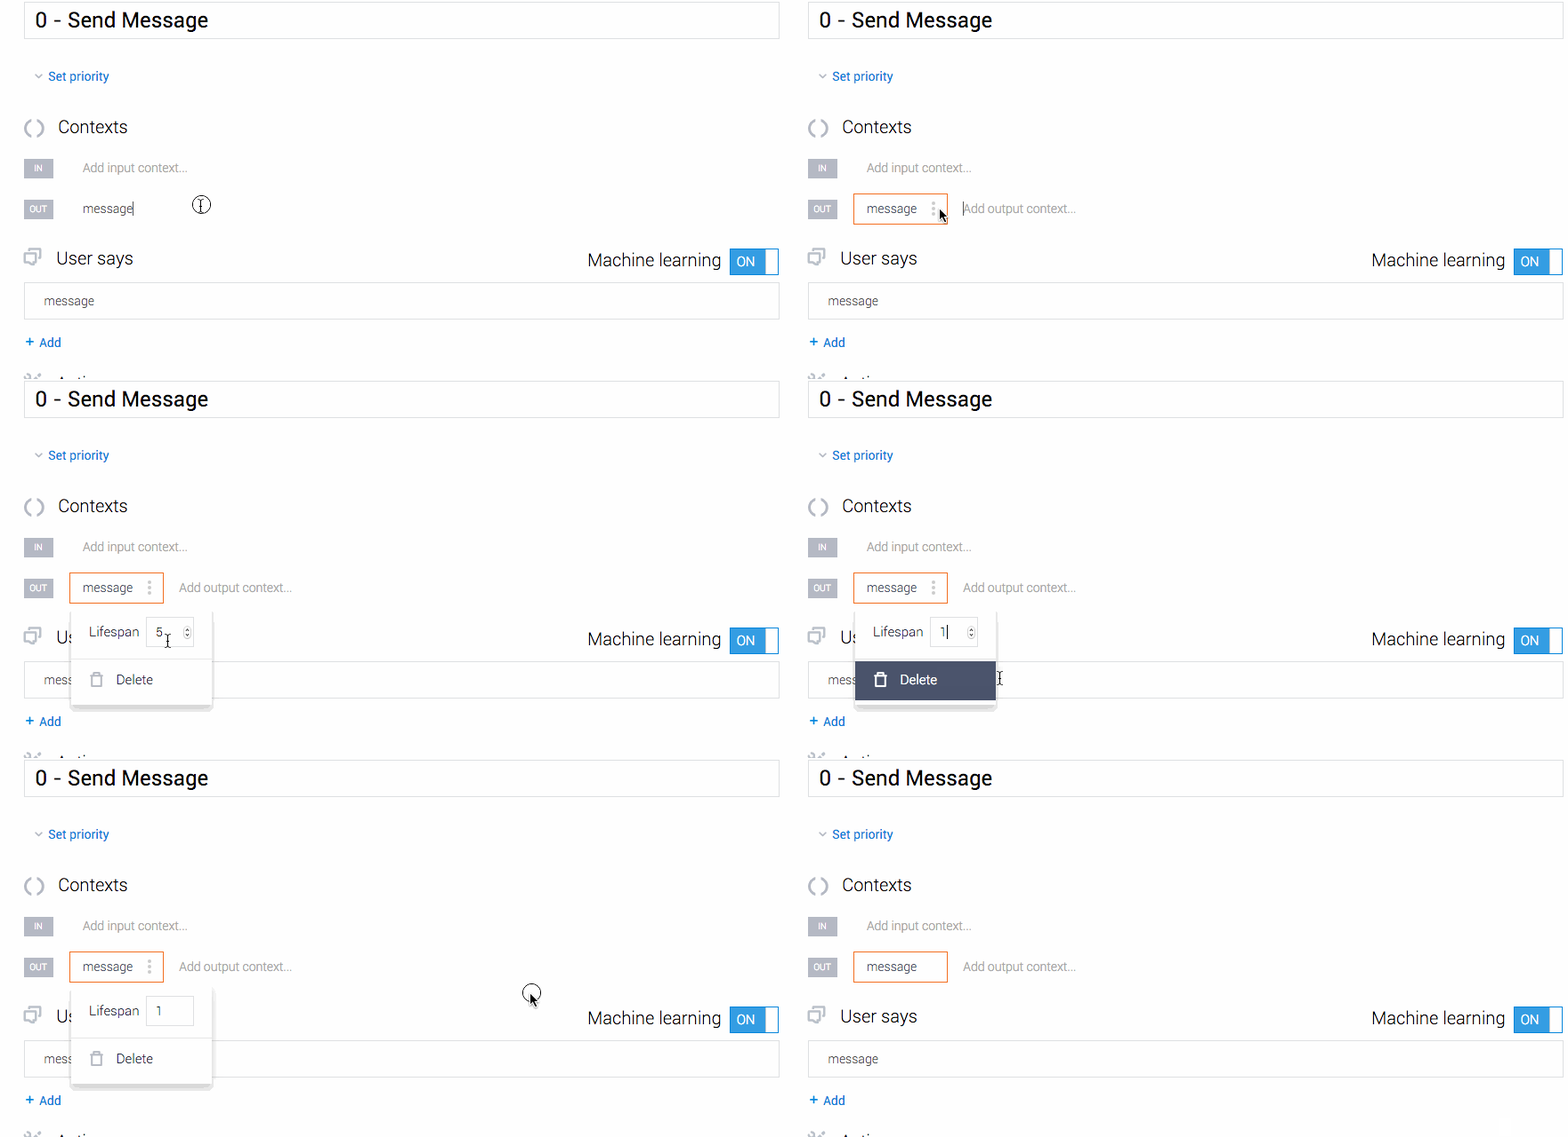
We will then use this as our input context in the intents 1.1 - Message correct - Yes, 1.2 - Message correct - No, and 1.3 - Message correct - Unknown in order to catch the user’s “Yes/No/Unknown” answers:
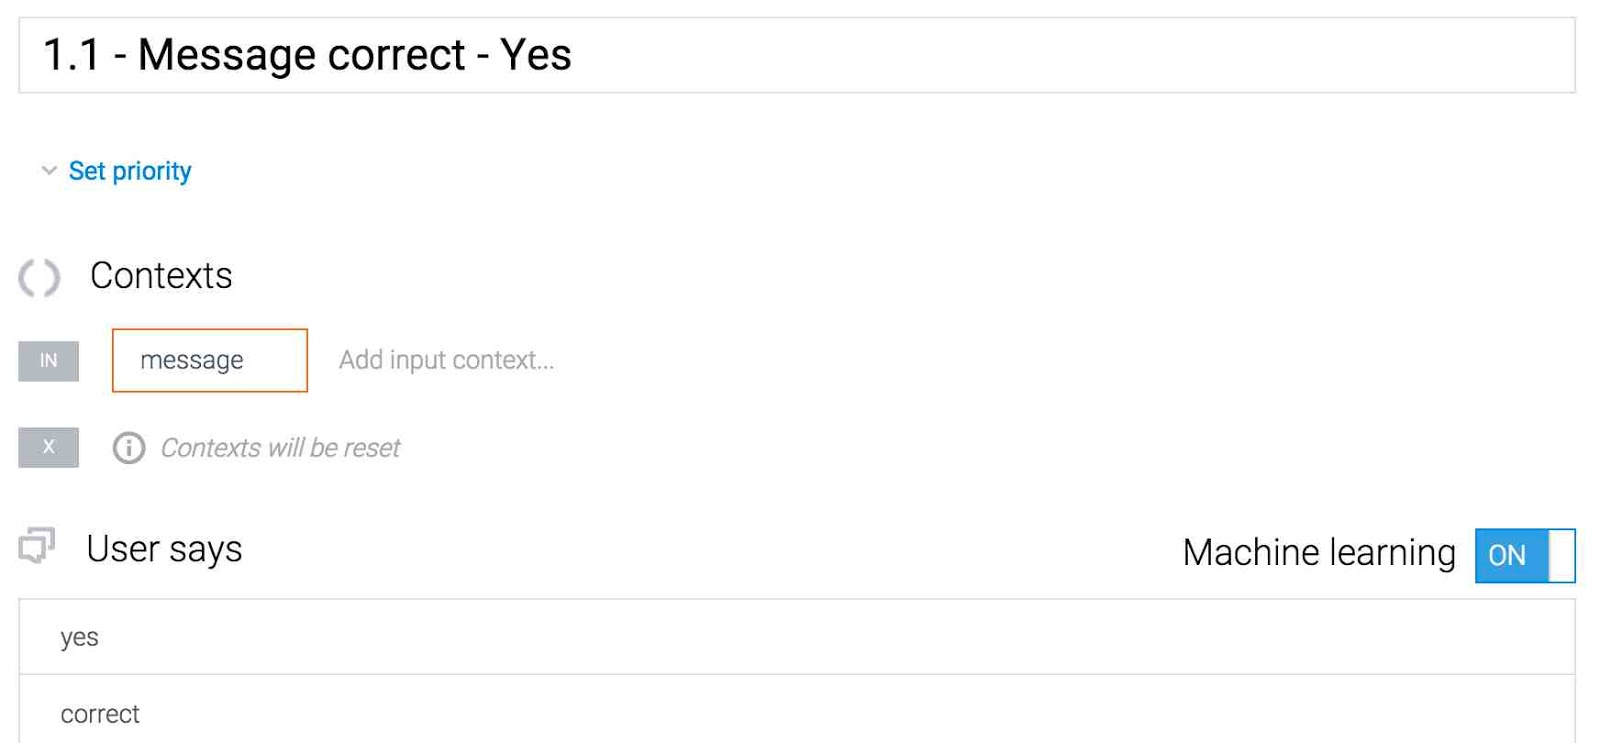
In the case of a positive answer, the agent will send a message with the parameter values collected in the first intent. Note that in order to refer to those values in the Speech Response, we’ll need to use the format #ContextName.ParameterName:

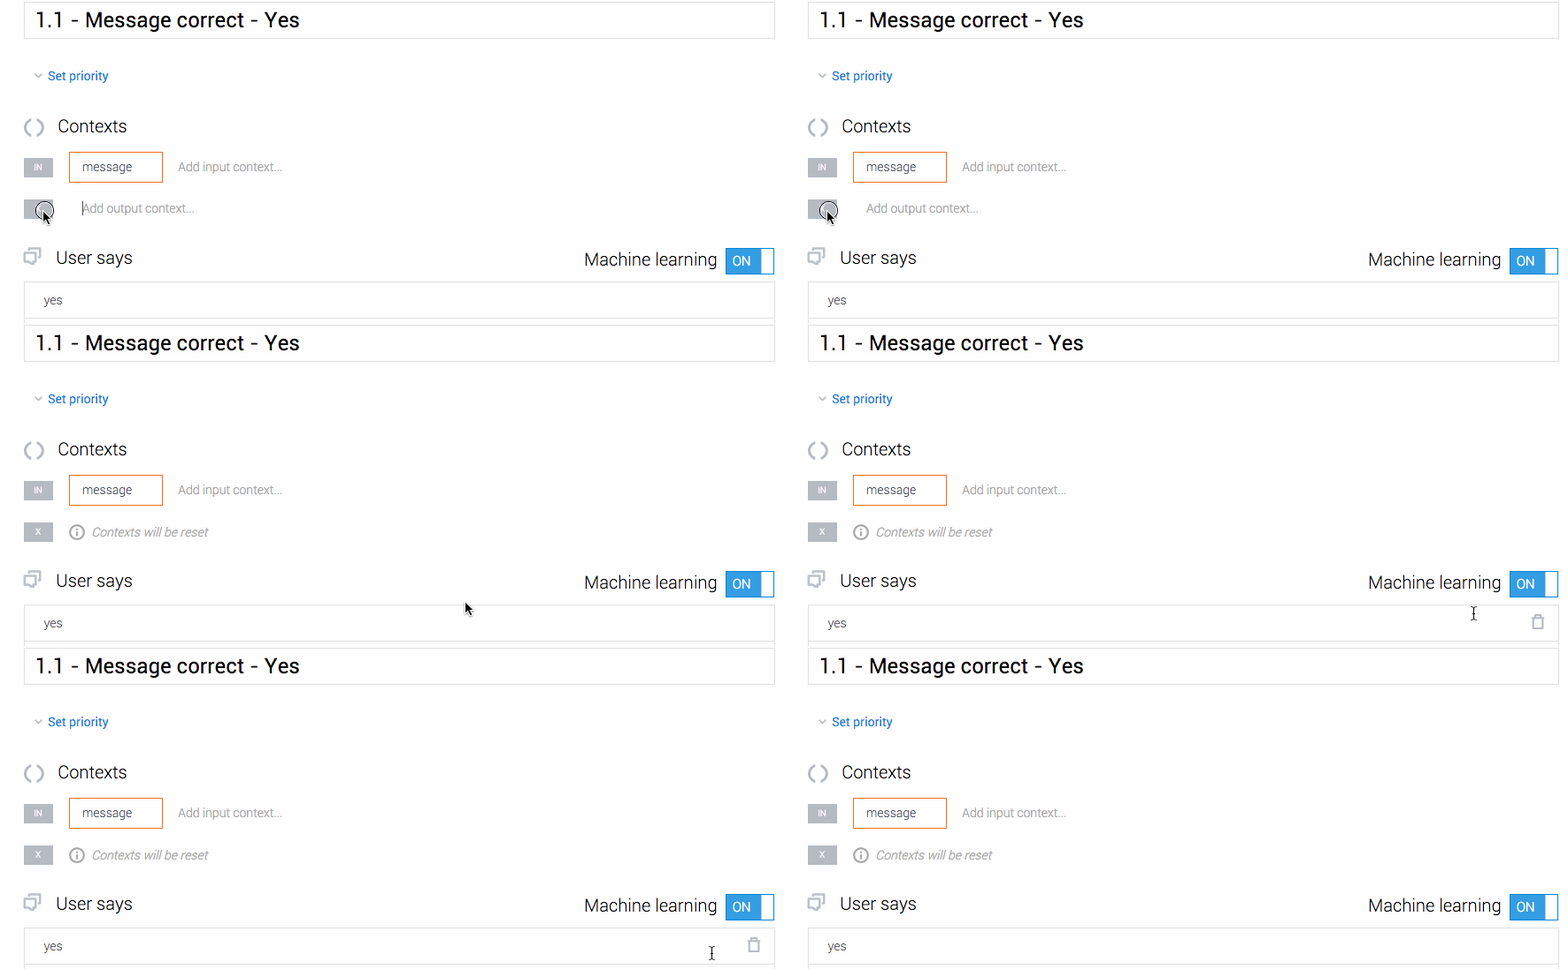
Since we don’t want to continue this dialog branch any further, we clear the output contexts. It is done by clicking on OUT button in the contexts section:
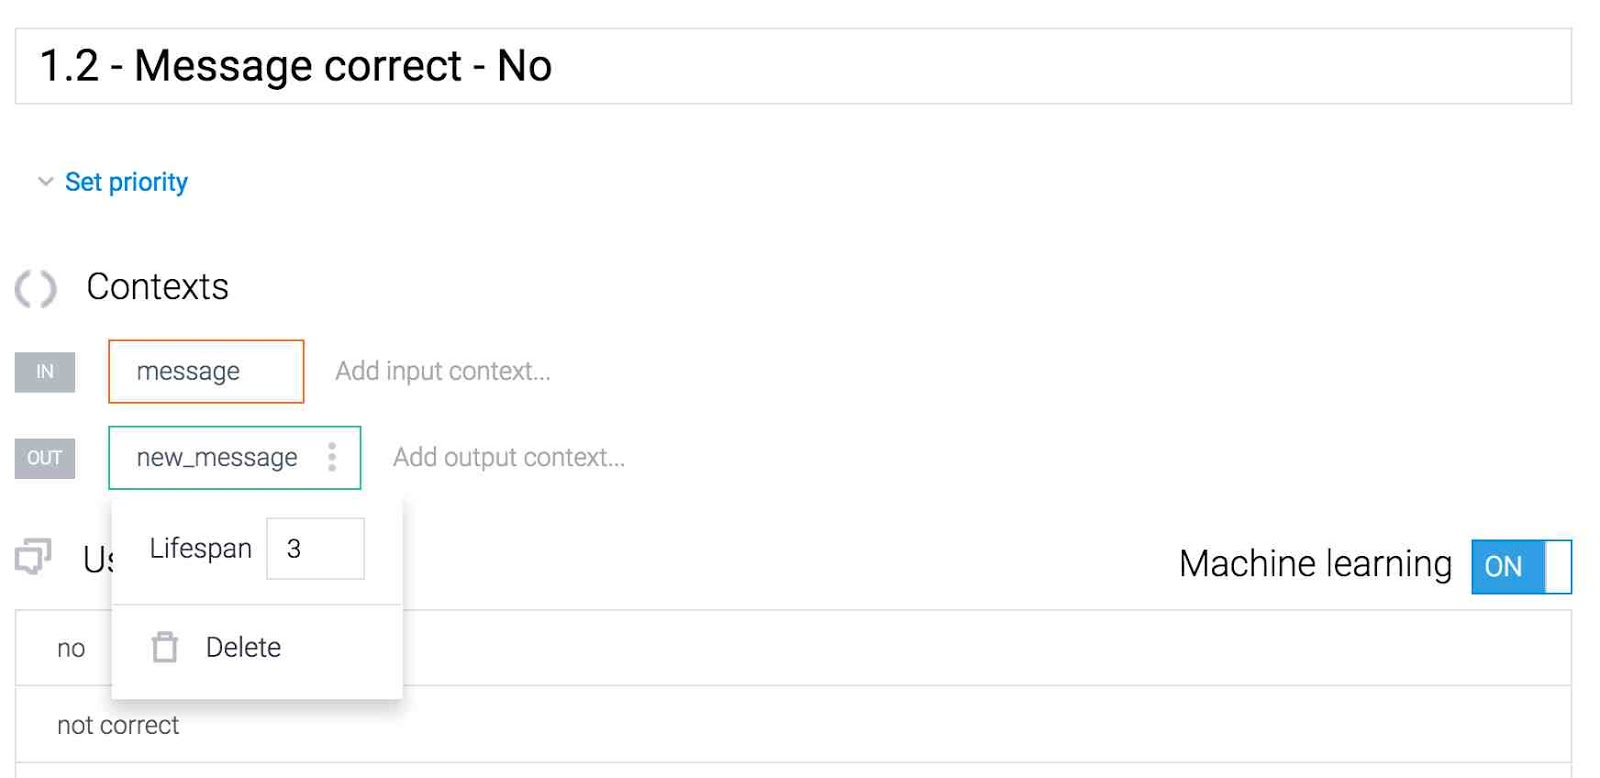
In the case of a negative answer, the dialog will continue within the new context new_message:
In the case of a neither positive, nor negative answer, the agent will continue asking the user for a “Yes” or “No” response:
The next intent “2 - New message” will catch the edited “text” and “name” values:
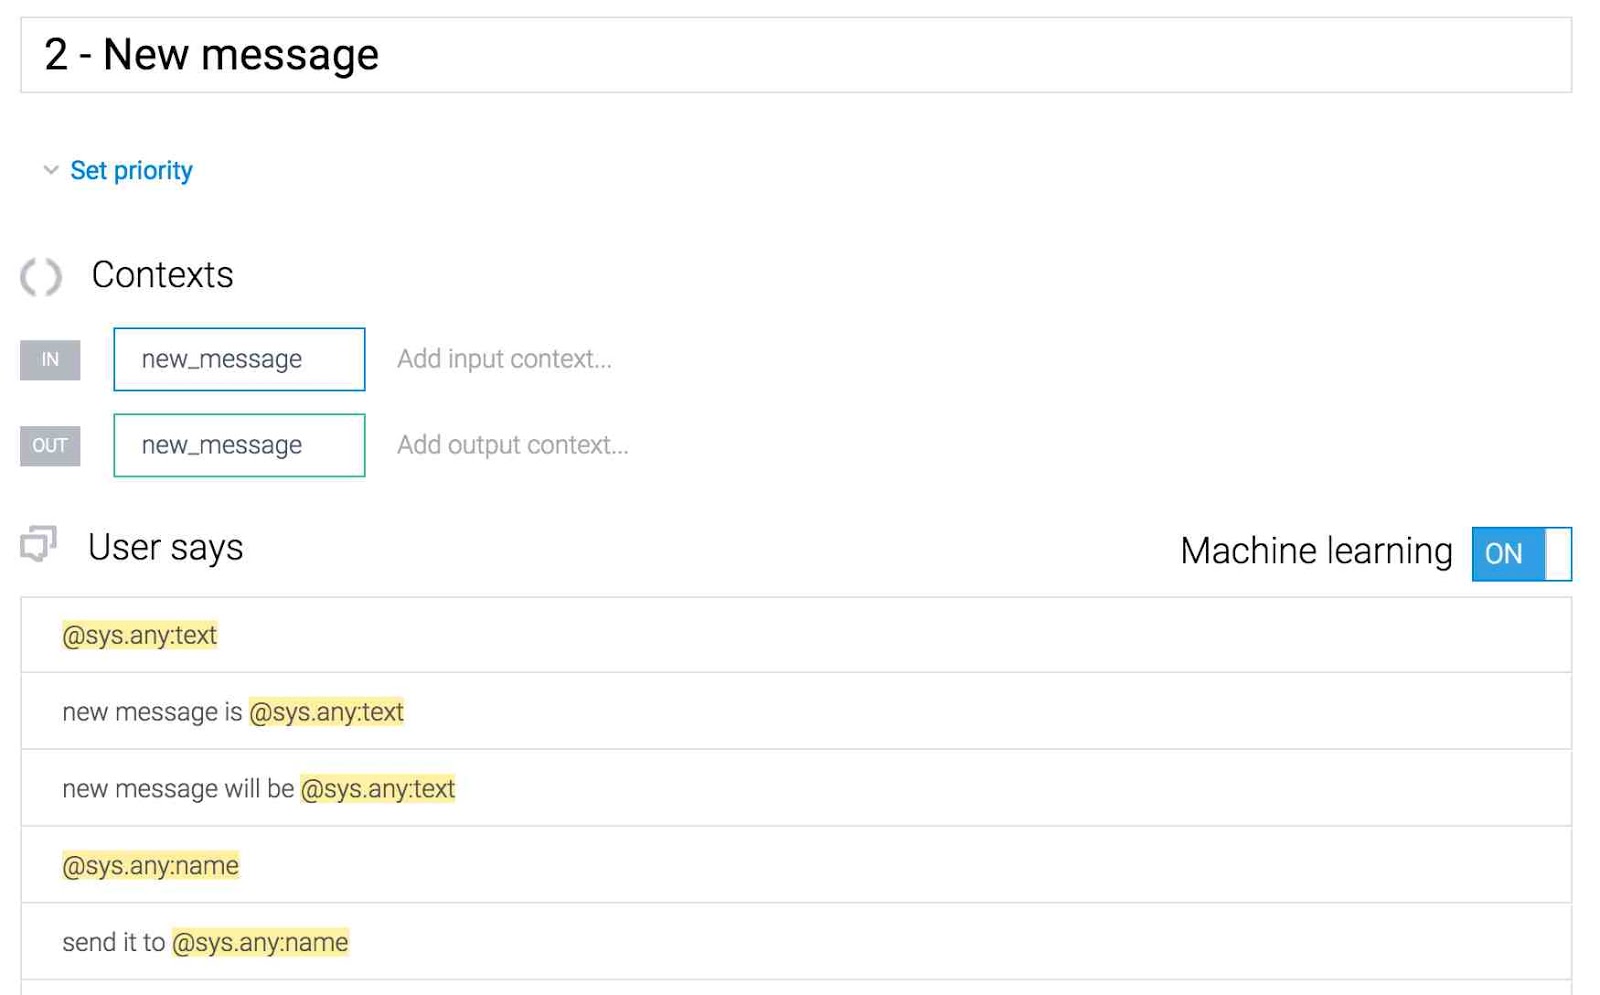
Since the question for filling the “text” value was already asked in the intent 1.2 - Message correct - No, we now only need a prompt for the “name” parameter:

When the edited values have been collected, the agent sends a message with these values:

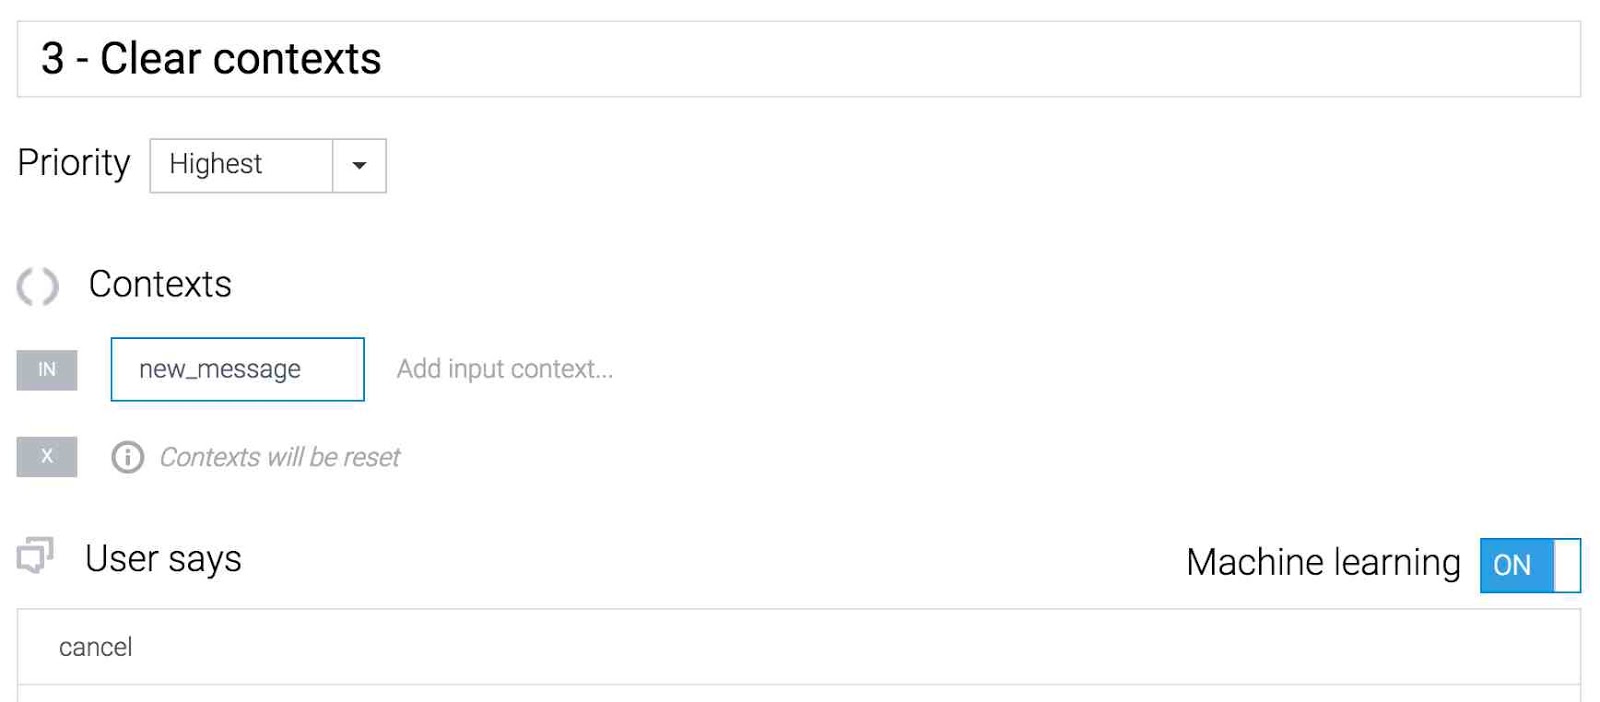
Finally, in order to clear all contexts, the intent “3 - Clear contexts” is created:
Our agent is ready! Now you can go back to the dialog structure flowchart and test all possible scenarios.