A context is a powerful tool that can help to create sophisticated voice interaction scenarios. In this post we’ll look at how you can use contexts to build dialogs.
When a dialog is created, it’s usually the case that many branches of conversation are possible. Therefore, intents in an agent should be designed so that they follow each other in the correct order during a conversation.
The best way to demonstrate how this works is to build a conversation together, step-by-step. As an example, we’re going to create an agent for a floral shop. You can download it here and try the instructions in your account.
First, let’s take a quick look at how contexts operate.
1. Using contexts
Contexts will appear in your agent just under the intent title. You should see two fields here: input and output contexts. Corresponding input and output contexts in intents will determine whether they follow or precede one another.

To add a context, just type its name into the field and press enter. The context will now appear as a box with a colored border.

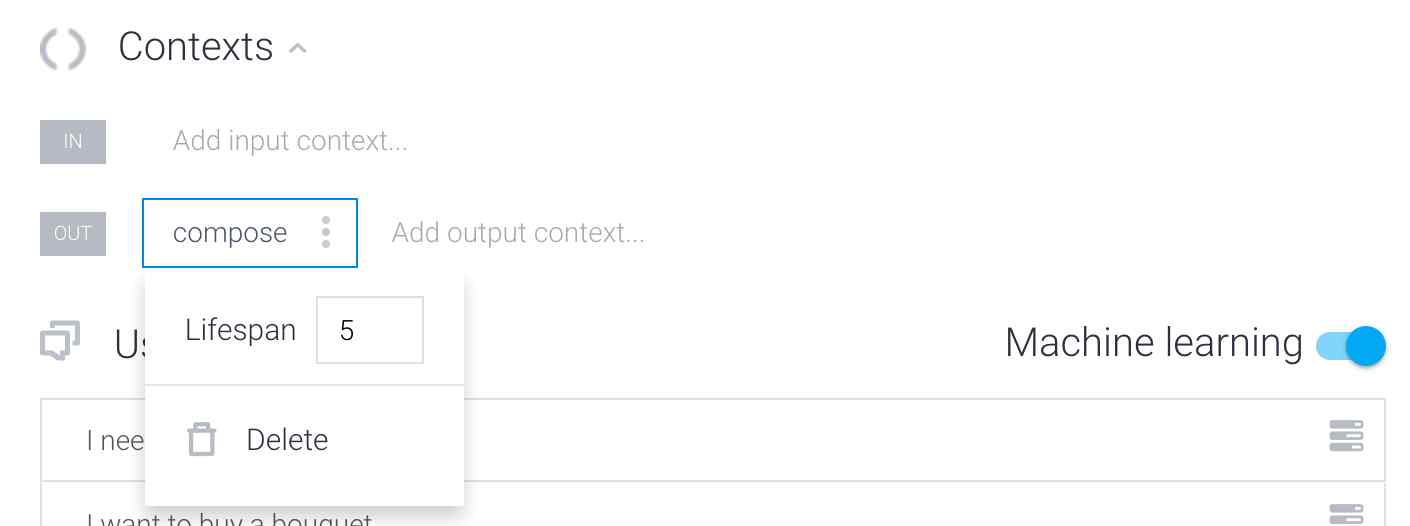
Here we’ve set an output context for our floral shop named ‘compose’. Once this intent is matched, the context ‘compose’ will be set. So any intents that have this as an incoming context will now have top priority when matching user requests. Note that these intents will not be matched if the context is not set.
All contexts have a very important property – lifespan.

By default the lifespan value is set to five. It means that the context will last for the next five matched intents. So if you have different input/output contexts in each of the following intents, all of them will be collected in the next five stages of the dialog, like a chain of contexts.
While this feature can be very useful, at times you may want to get rid of a context after the following intent is reached. In these situations you can simply change the lifespan to one.
2. Managing the conversation flow
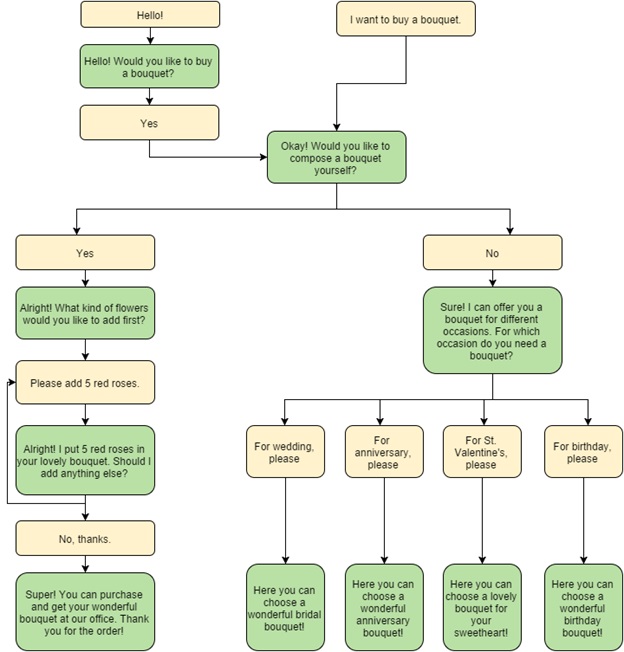
Now we’re ready to design the dialog we want our agent to produce. The best way to do this is to draw a scheme like the one pictured below. You can use Lucidchart for this.

From this scheme we can see that there are two main branches of the conversation. The first is for people who want to compose a bouquet themselves; the second provides the option to choose from one of four pre-made bouquets.
In order to manage these two branches of the conversation we’ll have to set different contexts.
The intent where fulfillment is ‘Okay! Would you like to compose a bouquet yourself?’, looks exactly as it was shown above: its name is ‘compose’ and it has an output context ‘compose’.
So we’ll have to create two different intents to match the possible answers. We’ll make one for ‘yes’:

And one for ‘no’:

In both intents we have the same input context: ‘compose’. So after the intent ‘compose’ was matched and the context ‘compose’ was set, we can then logically only reach those intents with an input context ‘compose’. So if we say ‘yes’ we get into the ‘yes - compose’ intent; if ‘no’, then we are in the ‘no - compose’ intent.
And now comes the most crucial point: we have to set different output contexts. So in order to continue choosing the flowers we have to set now ‘yes - compose’ context as output, and then as an input context to the following intents. The same goes for the other intent. In order to choose one of the pre-made floral arrangements, we have to set an output context ‘no - compose’ and then create the following intent with ‘no - compose’ as the input context.
This same logic applies along the whole dialog structure. Whenever you need to go further to a specific intent, you should set the corresponding contexts. This is especially important when you have multiple ‘yes/no’ answers in the conversation.
3. Gathering the parameters’ values
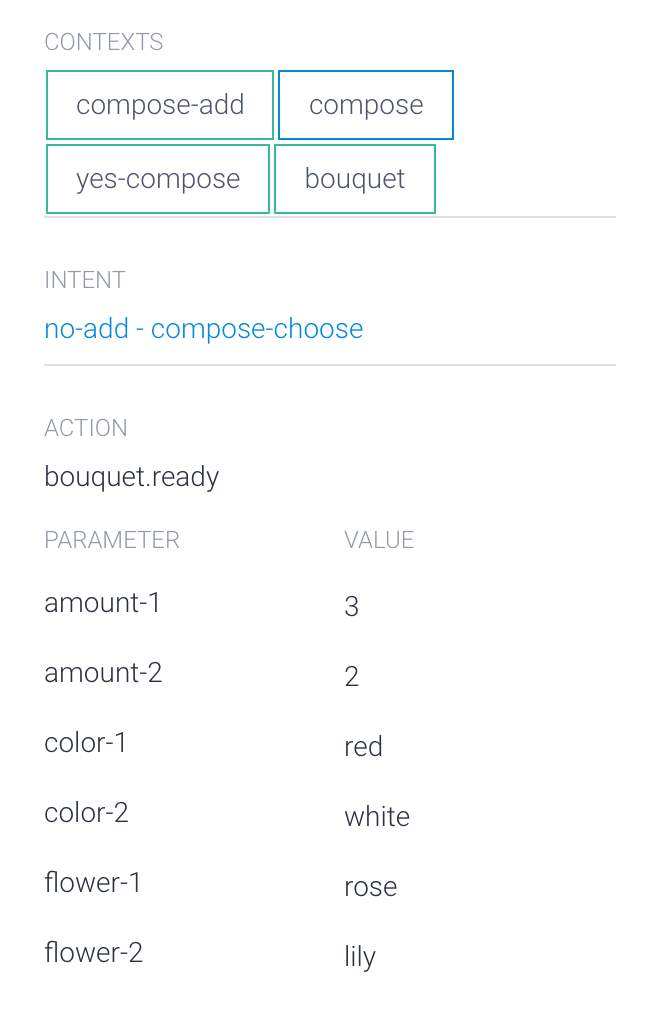
The other important function of the context is its ability to collect the parameters’ values. In our example, we’re collecting information during the dialog so we know by the end how to fill the customer’s order – how many flowers of what kind and what color we should add, or alternately, which pre-made bouquet we should choose. As long as a certain context is still alive (i.e., within its lifespan) the value we get from a parameter (if it was set in a context) is also alive.
In order to collect all the values at the end, we just have to set one context, which will appear in every intent, both input and output (except for the very first intent, where we set the output context only).
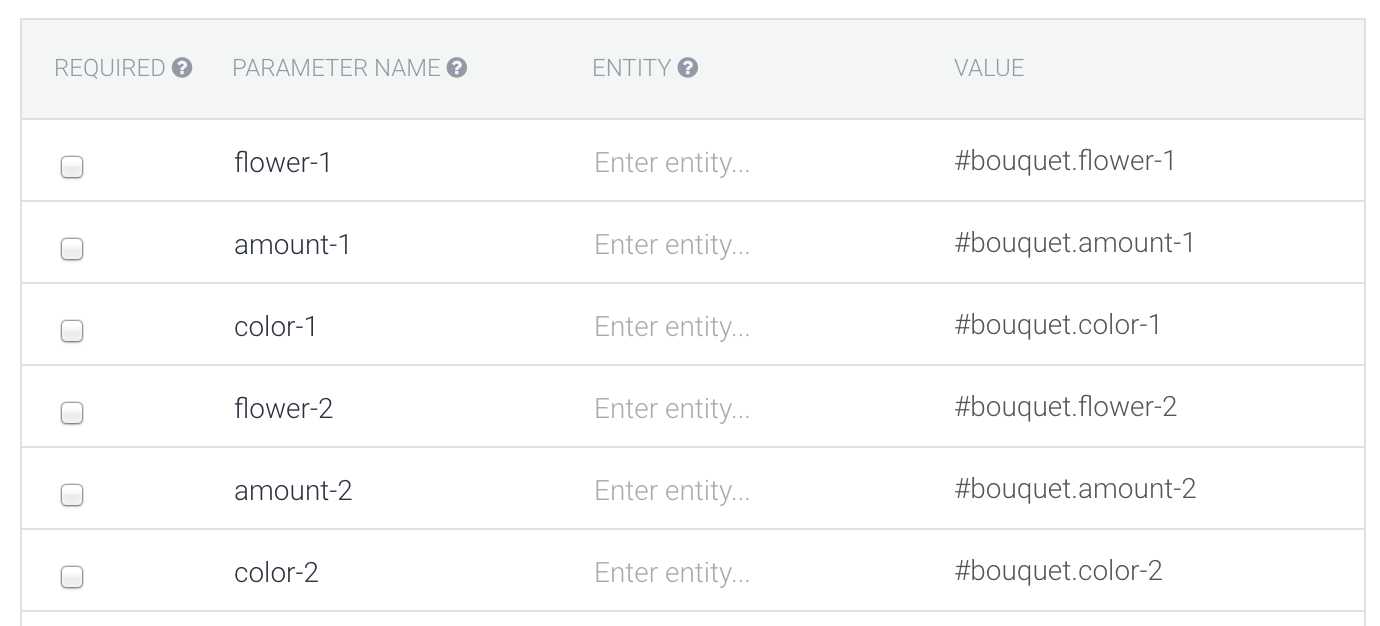
We just have to slightly modify what we see in the screenshots above:

To retrieve the parameters from the context, write: #context_name.parameter_value:

Then in the dialog those values will look the same as always:

Feel free to play around with this example. You can download the agent here.